
We are Official Certified bubble.io & flutterflow App Development partner


Integrating OpenAI with FlutterFlow: A Step-by-Step Guide
Introduction
Artificial Intelligence can significantly enhance your FlutterFlow applications by enabling features such as chatbots, content generation, summarization, translations, recommendations, and more.
In this tutorial, we'll learn how to integrate OpenAI with FlutterFlow using API Calls. By the end, you'll be able to send prompts from your app and receive AI-generated responses.
What are OpenAI APIs?
OpenAI APIs are cloud-based services that allow applications to access powerful artificial intelligence models through simple HTTP requests. Instead of building and training AI models from scratch, developers can send prompts, questions, or data to OpenAI's servers and receive intelligent responses in return. These APIs can generate text, answer questions, summarize content, translate languages, analyze information, and perform many other AI-powered tasks.
For FlutterFlow developers, OpenAI APIs provide an easy way to add advanced AI capabilities without needing machine learning expertise. By configuring an API call, your application can interact with OpenAI models and deliver intelligent features directly to users, making AI integration accessible even for low-code and no-code development teams.
Benefits of Integrating OpenAI into Your FlutterFlow App
Integrating OpenAI can significantly enhance user experience by providing personalized, dynamic, and intelligent interactions. Features such as AI chat assistants, content generation, automated customer support, text summarization, language translation, and recommendation systems can be implemented with minimal development effort. These capabilities help applications become more engaging, useful, and interactive.
OpenAI integration can also reduce operational workload and improve efficiency. Tasks that would normally require manual effort—such as answering common user questions, generating marketing content, drafting messages, or processing large amounts of text—can be automated through AI. This allows businesses to scale their services more effectively while providing faster and more consistent experiences to their users.
Prerequisites
Before starting, make sure you have:
● A FlutterFlow account
● An OpenAI account
● Basic understanding of FlutterFlow API Calls
● A FlutterFlow project ready for integration
How to Integrate OpenAI in Flutterflow?
Step 1: Create an OpenAI Account
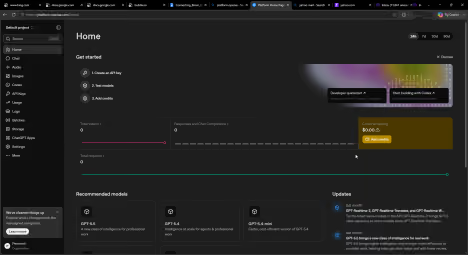
Visit the OpenAI platform and create an account if you don't already have one. OpenAI Platform:
OpenAI Platform
Step 2: Generate an OpenAI API Key
1. Open the OpenAI dashboard.
2. Navigate to API Keys.
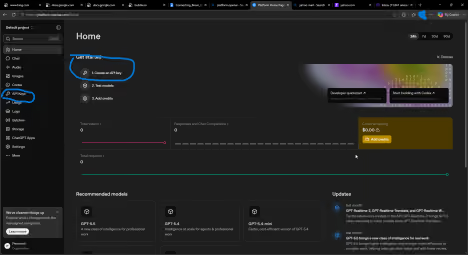
(if a fresh account, you will see create an api key option on your dashboard as marked in the picture, you can tap there to generate your key)
3. Click Create New Secret Key.
4. Give the key a name.
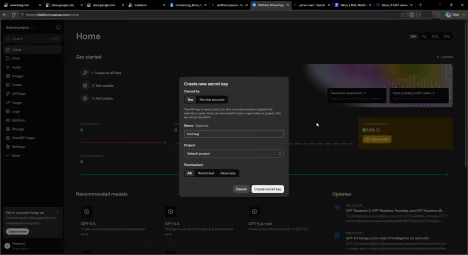
5. Copy and securely store the generated key.
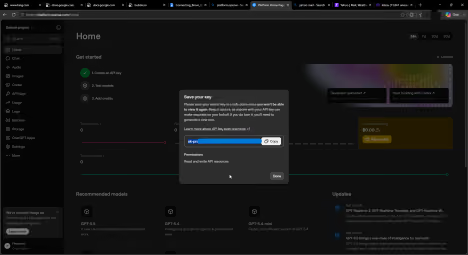
⚠️ Important: You will only see the key once. Store it safely.
Understanding OpenAI APIs
OpenAI provides several APIs. The most commonly used for FlutterFlow applications is the Responses API.
Responses API
The Responses API allows you to send a prompt and receive AI-generated output. Common use cases:
● Chat assistants
● Content generation
● Summarization
● Email drafting
● Product descriptions
● Language translation
Step 3: Configure OpenAI API in FlutterFlow
In FlutterFlow:
1. Open your project.
2. Navigate to Backend → API Calls.
3. Click Add API Call.
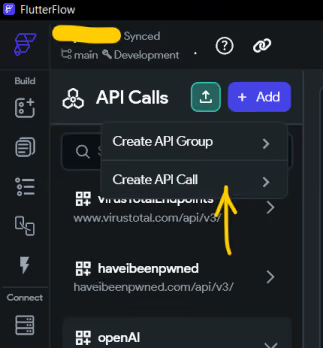
Step 4: Create the API Call
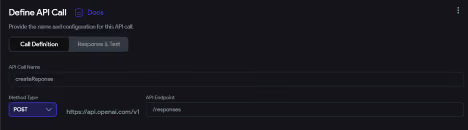
Configure the API Call with the following settings.
API Name
OpenAIResponse
API Method
POST
API URL
https://api.openai.com/v1/responses
*IMPORTANT NOTE: For production applications, store the API key as a FlutterFlow Secret rather than hardcoding it.

Step 5: Configure the Request Body
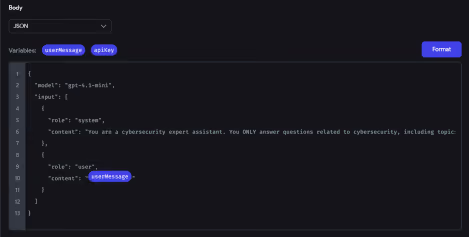
Select JSON Body and add:
{
"model": "gpt-5",
"input": "Write a short welcome message for a wellness app."
}
Explanation
model
Specifies which OpenAI model will generate the response.
Example:
"model": "gpt-5"
input
The prompt or instruction sent to the AI.
Example:
"input": "Write a short welcome message for a wellness app."
Step 6: Test the API Call
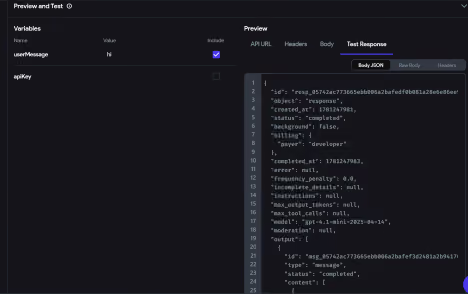
Click Test API Call.
If everything is configured correctly, you should receive a successful response from OpenAI. Example response:
{
"output": [
{
"content": [
{
"text": "Welcome to your wellness journey..."
}
]
}
]
}
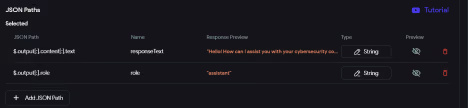
Step 7: Create Response JSON Paths
FlutterFlow needs to know where the AI response is located.
Add a JSON Path for the generated text.
Example:
$.output[:].content[:].text
Step 8: Add User Input
Create a TextField where users can enter prompts.
Examples:
● Ask a question
● Generate content
● Summarize text
● Translate text
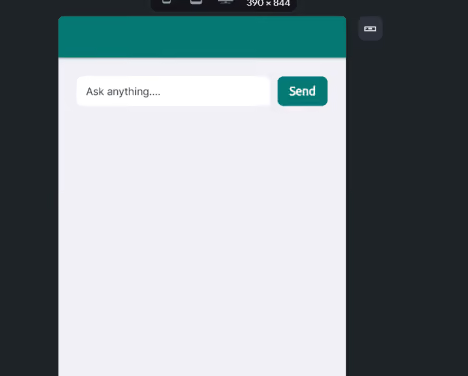
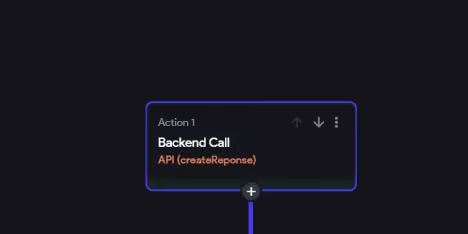
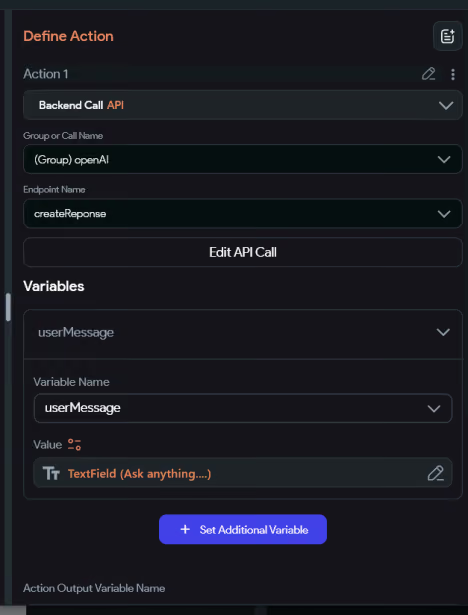
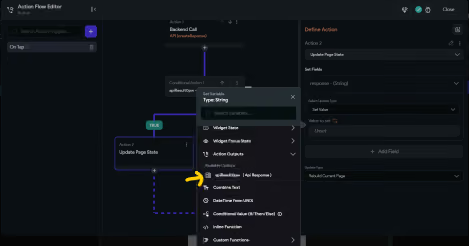
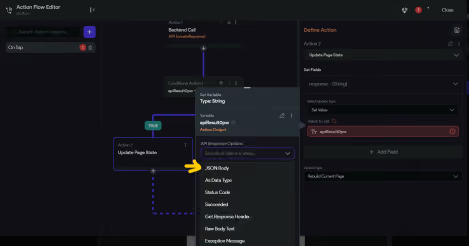
On send button tap, we hit our response API Call.
Step 9: Display the AI Response
After the API call:
1. Store the response in a page state variable.
2. Bind the variable to a Text widget.
Flow:
User enters prompt
↓
API Call executes
↓
OpenAI generates response
↓
Response stored in variable
↓
Displayed on screen
Common Use Cases
AI Chatbot
User asks questions and receives AI-generated responses.
Content Generation
Generate:
● Product descriptions
● Blog content
● Marketing copy
Text Summarization
Convert long text into concise summaries.
Translation
Translate content between multiple languages.
Customer Support
Provide instant automated responses to user queries.
Security Best Practices
Never Expose API Keys
Do not hardcode OpenAI API keys inside widgets, custom code, or client-side variables. Use:
● FlutterFlow Secrets/Environment keys
● Backend services
● Secure server-side functions
Restrict API Usage
Monitor API usage regularly through the OpenAI dashboard to identify unexpected activity.
Validate User Input
Before sending prompts:
● Check for empty inputs
● Apply character limits
● Filter unwanted content where necessary
Protect Sensitive Data
Avoid sending:
● Passwords
● Financial information
● Personally identifiable information (PII)
to AI services unless your application explicitly requires it and complies with your privacy requirements.
Conclusion
Integrating OpenAI with FlutterFlow is straightforward using API Calls. By configuring the Responses API, mapping request parameters, and displaying returned content, you can quickly add AI-powered experiences such as chatbots, content generation, translations, and summarization to your applications.
Once the basic integration is working, you can expand it further by adding conversation history, custom prompts, structured outputs, and advanced workflows to create more intelligent user experiences.
.svg)
.svg)


.avif)
