
We are Official Certified bubble.io & flutterflow App Development partner


Custom Claims are a secure method used in Firebase Authentication to manage user roles such as admin, user, or moderator. Instead of storing these roles in Firestore, the role information is directly added to the user's authentication token. This token is generated by Firebase after login and contains verified user information that cannot be modified from the client side.
The main advantage of Custom Claims is security. Since the role is stored inside the Firebase ID token, users cannot manually change their role from the app or browser. Only a trusted backend using the Firebase Admin SDK can assign or update these claims, ensuring full control over who becomes an admin.
When a user logs in, Firebase automatically includes these claims in their token, and the application can check them to control access to specific features or screens. For example, if a user has "admin": true in their token, they are allowed to access admin-only functions, otherwise access is restricted.
Start the setup guidance:
Step 1: create a new user throughout the signup foam
Step 2: Goto the “Google Cloud Console” and select you project
Step 3: open the Terminal (Cloud Shell) and your screen looks like.
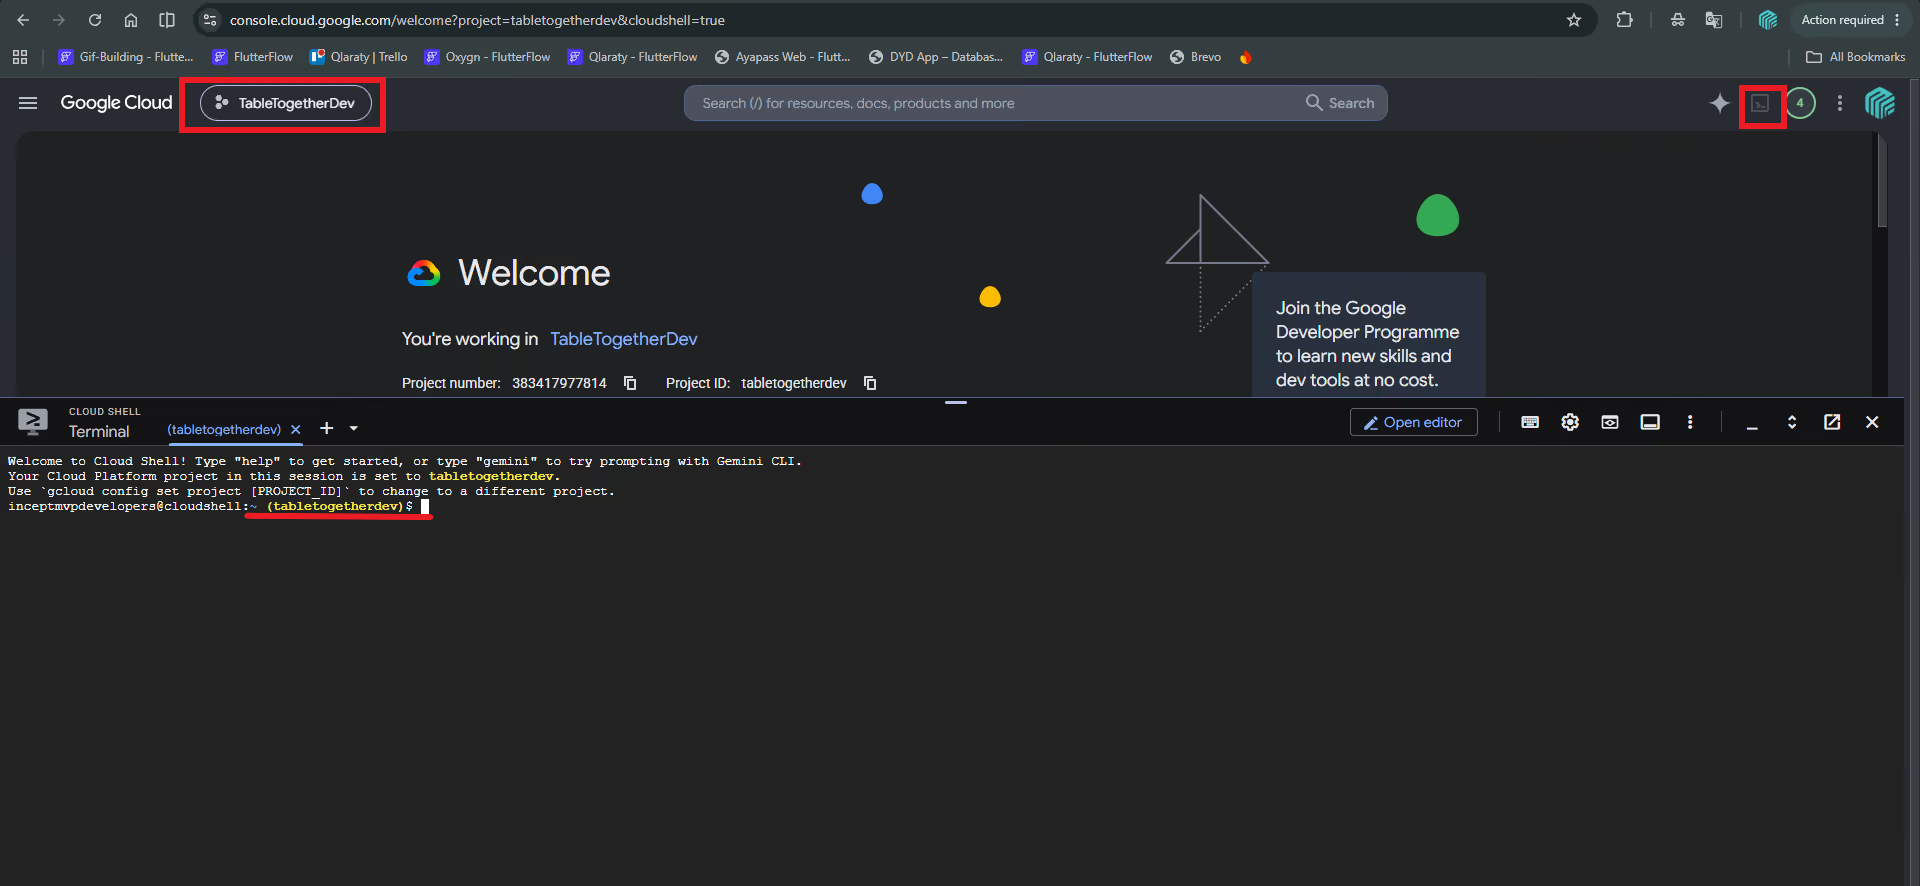
Step 4: Initialize Project (run these commands one-by-one)
Step 5: Create a file
const admin = require("firebase-admin");
admin.initializeApp({
credential: admin.credential.applicationDefault(),
});
const uid = "USER_UID_HERE";
admin.auth().setCustomUserClaims(uid, { admin: true })
.then(() => {
console.log("Admin claim set!");
process.exit(0);
})
.catch((error) => {
console.error(error);
process.exit(1);
});
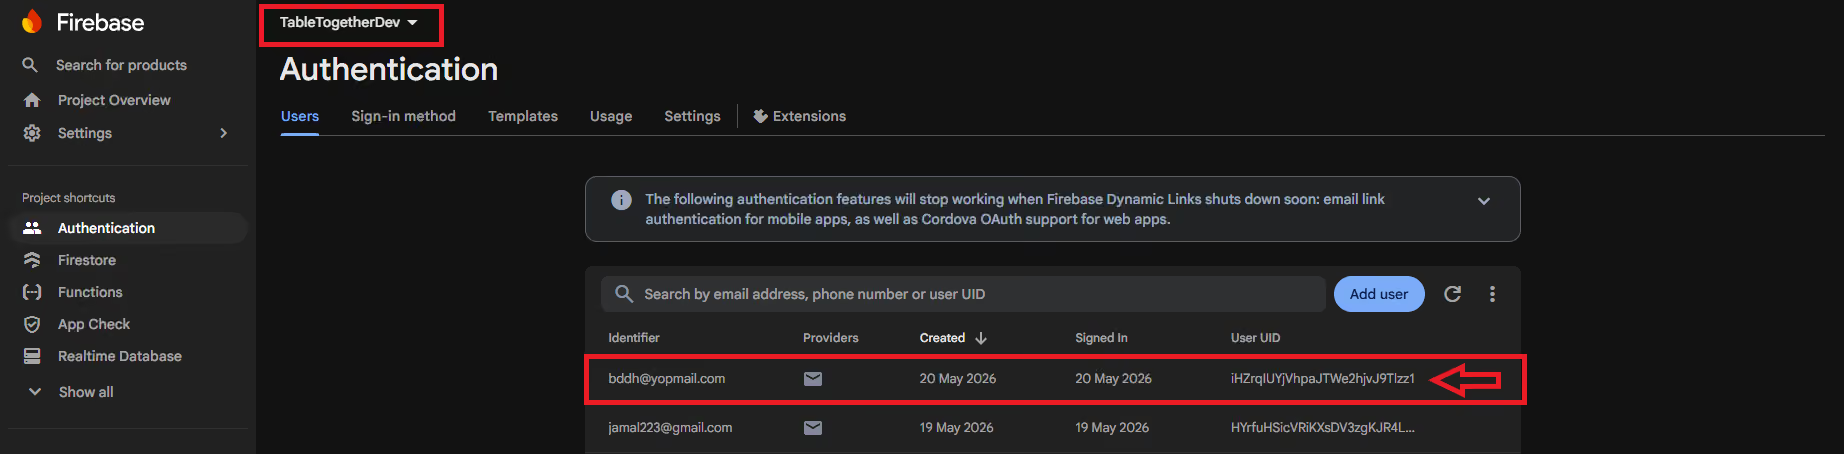
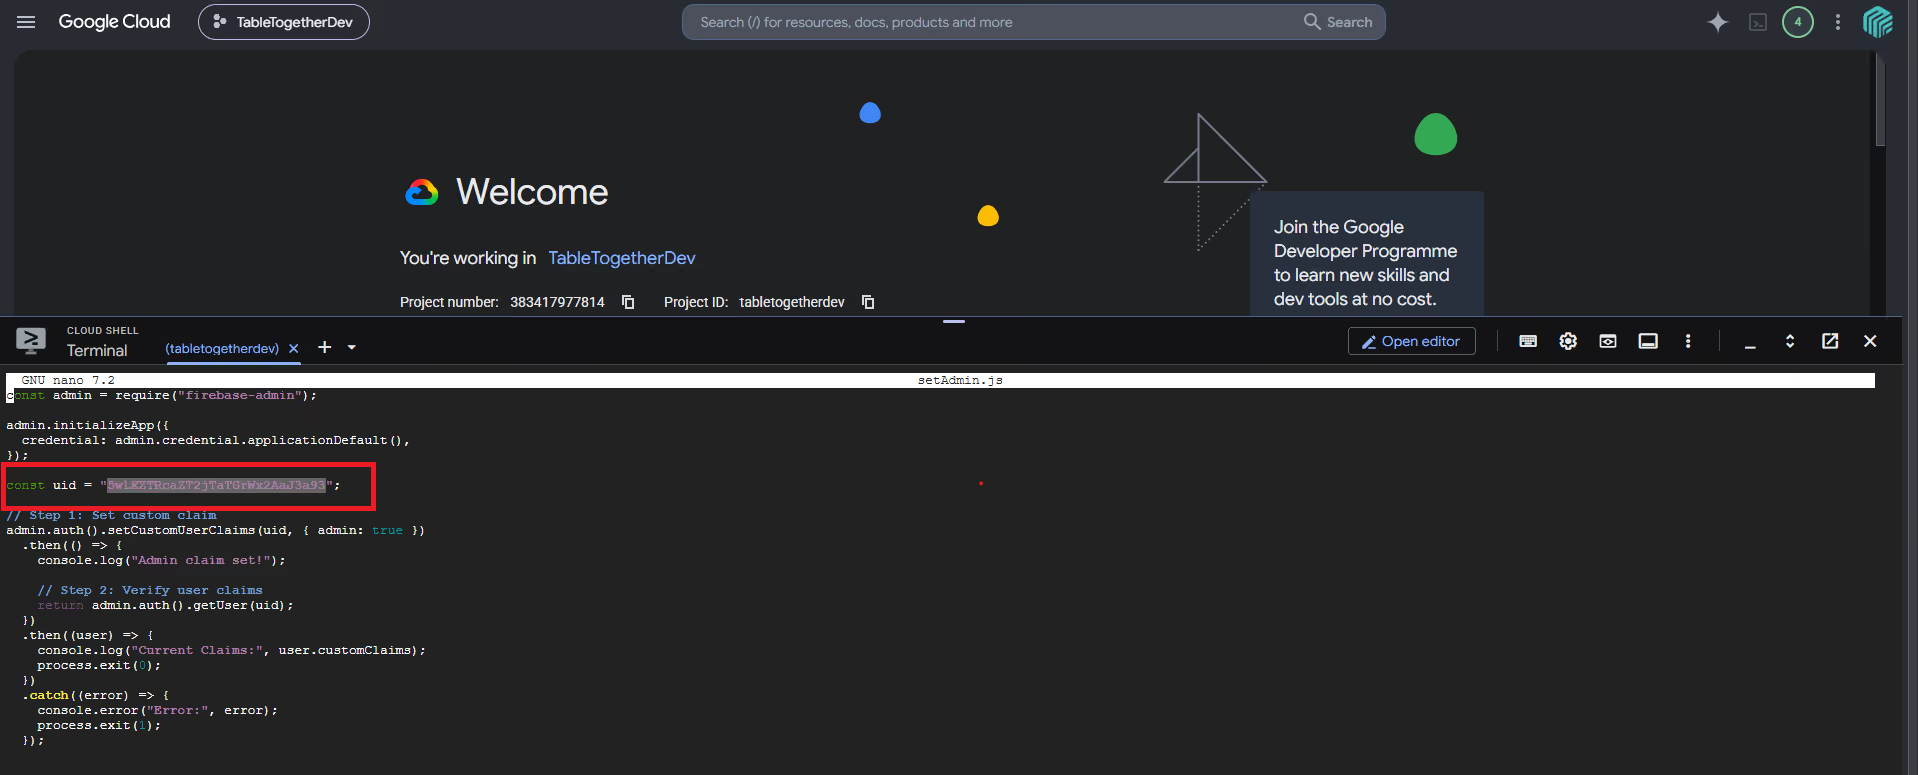
Step 6: Run that file with these commands
Step 7: Adding Admin to the firebase advanced rule
move to the rules section and past the “isAdmin()” function here.
function isAdmin() {
return IsAuth() && request.auth.token.admin == true;
}
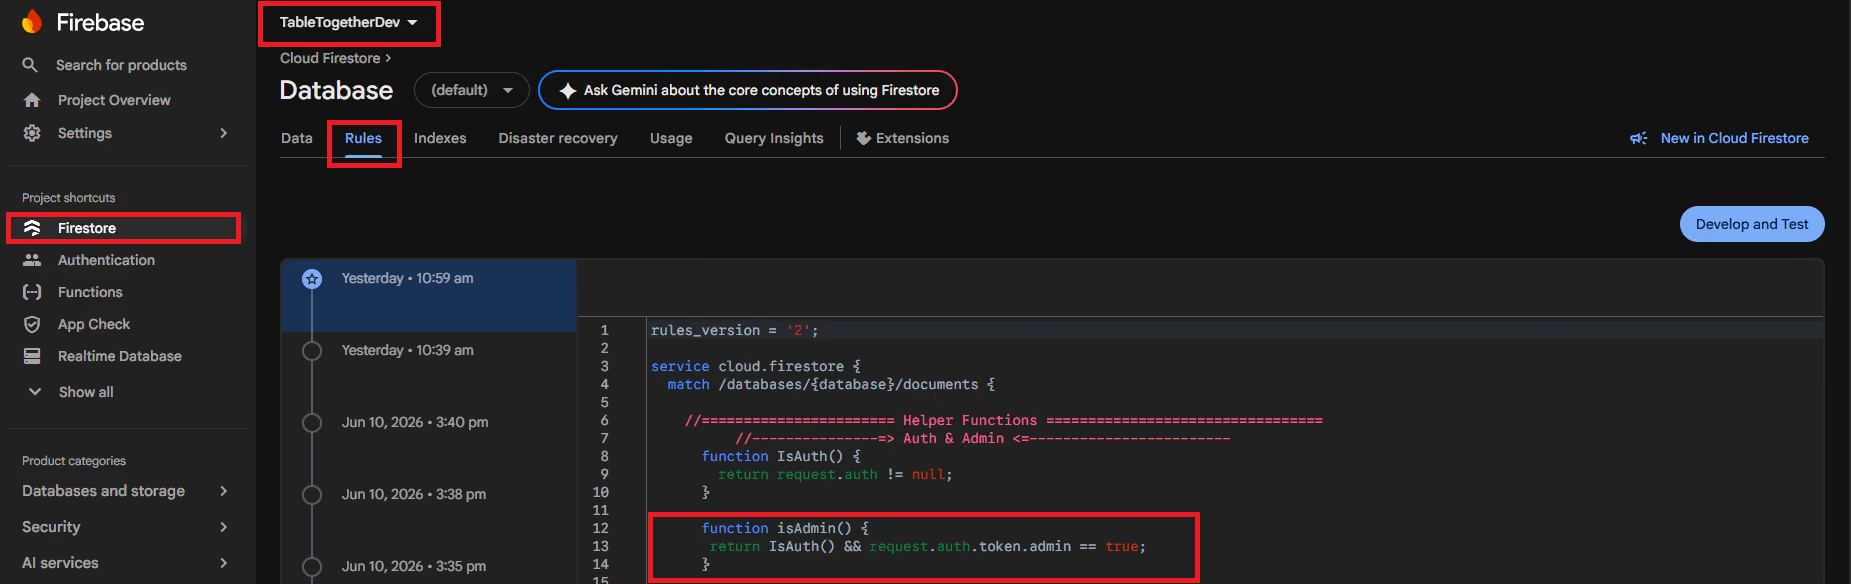
Suppose you want to give the access to the admin of any table simple assign the
isAdmin() function in the firebase rules

Step 8: Verify admin user in Flutterflow
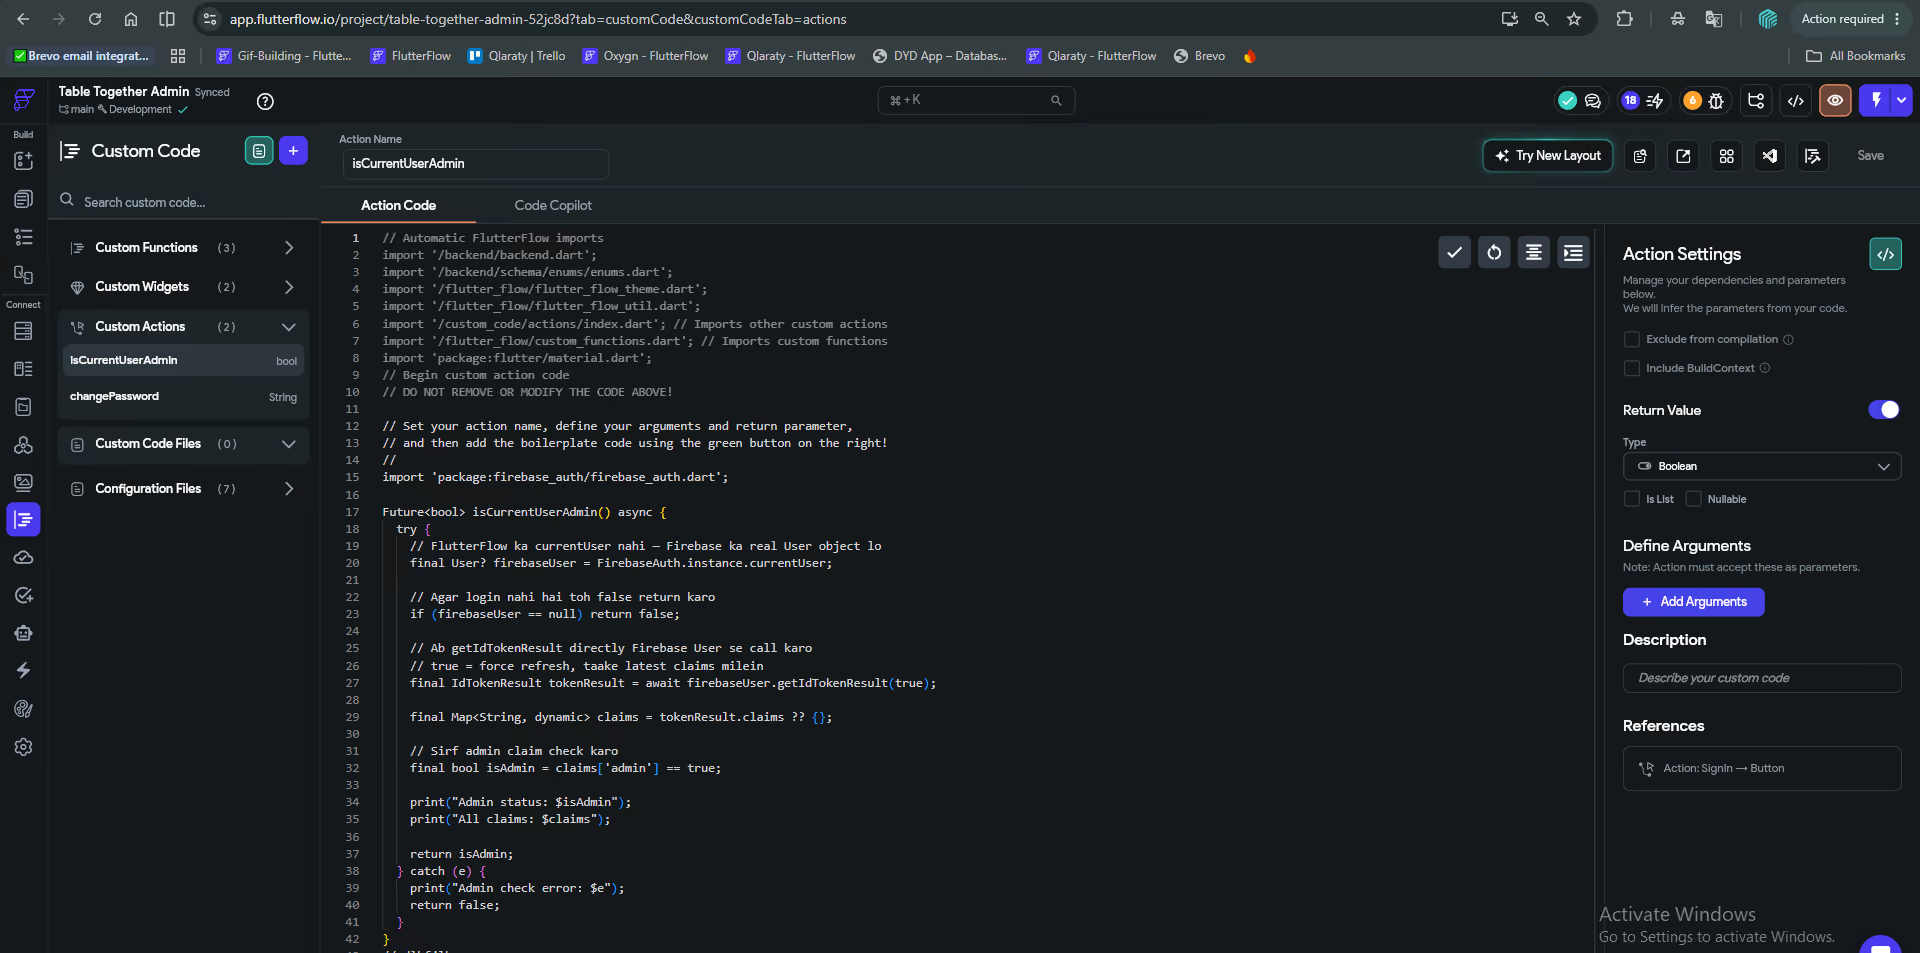
// Automatic FlutterFlow imports
import '/backend/backend.dart';
import '/backend/schema/enums/enums.dart';
import '/flutter_flow/flutter_flow_theme.dart';
import '/flutter_flow/flutter_flow_util.dart';
import '/custom_code/actions/index.dart'; // Imports other custom actions
import '/flutter_flow/custom_functions.dart'; // Imports custom functions
import 'package:flutter/material.dart';
// Begin custom action code
// DO NOT REMOVE OR MODIFY THE CODE ABOVE!
// Set your action name, define your arguments and return parameter,
// and then add the boilerplate code using the green button on the right!
//
import 'package:firebase_auth/firebase_auth.dart';
Future<bool> isCurrentUserAdmin() async {
try {
// FlutterFlow ka currentUser nahi — Firebase ka real User object lo
final User? firebaseUser = FirebaseAuth.instance.currentUser;
// Agar login nahi hai toh false return karo
if (firebaseUser == null) return false;
// Ab getIdTokenResult directly Firebase User se call karo
// true = force refresh, taake latest claims milein
final IdTokenResult tokenResult = await firebaseUser.getIdTokenResult(true);
final Map<String, dynamic> claims = tokenResult.claims ?? {};
// Sirf admin claim check karo
final bool isAdmin = claims['admin'] == true;
print("Admin status: $isAdmin");
print("All claims: $claims");
return isAdmin;
} catch (e) {
print("Admin check error: $e");
return false;
}}
Step 9: Validate your admin
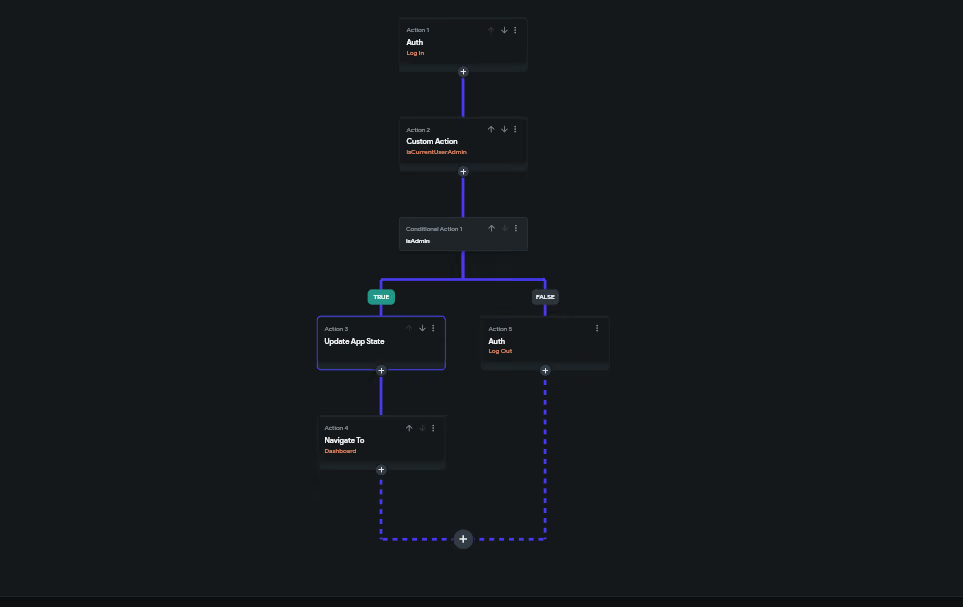
Finished custom claim Setup
.svg)
.svg)


.avif)
