
We are Official Certified bubble.io & flutterflow App Development partner


Beginner's Guide: Building Sign Up, Log In, and Forgot Password in
FlutterFlow
This guide will teach you how to set up user accounts in your app using FlutterFlow. You will learn how to let users sign up, log in securely, and reset their passwords. We will focus on using Supabase and Firebase to handle the user details.
What is Authentication?
Authentication (or "Auth") simply means verifying who a user is. It lets your app check if a user is who they say they are before letting them see private pages. It includes three main features: ● Sign Up: Creating a new account.
● Log In: Letting an existing user back into the app.
● Forgot Password: Helping users get back into their account if they forget their password. Why Do We Need It?
● Security: It keeps your users' private information safe.
● Personalization: It allows the app to remember the user's name, profile picture, and history.
● Persistence: It keeps users logged in so they don't have to type their password every single time they open the app.
How to Set It Up
Step 1: Turn on Email Login in Supabase
Before coding in FlutterFlow, you need to tell Supabase to allow email and password accounts. 1. Go to your Supabase Dashboard and click on your project.
2. Click Authentication on the left menu, then click Providers.
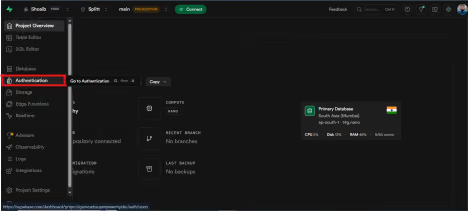
Figure 1: Authentication Providers in Supabase Dashboard
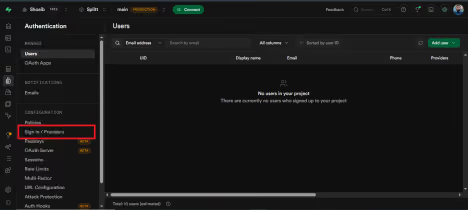
Figure 2: Authentication Settings Overview
3. Look for Email and switch it ON.
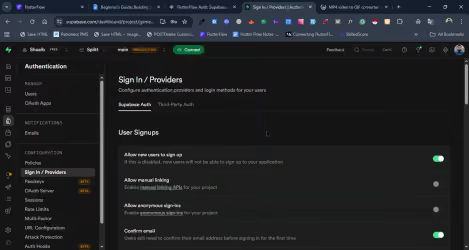
Figure 3: Enabling Email Provider in Supabase
4. If you have not connected the Supabase project with FlutterFlow yet, then go to your FlutterFlow project and Connect Supabase.
○ Open the Flutterflow project, navigate to Settings > Supabase.
○ You will see the two options. Connect to Supabase OAuth OR connect to self-hosted Supabase.
○ For now, click on the first option. This opens the Authorization Popup of Supabase, where you can select the Organization. And click on Authorize Flutterflow. This will connect your selected organization with FlutterFlow, and you will see all of your projects under this organization. Select one project to connect.
○
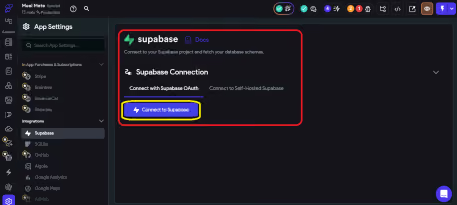
Figure 4: Connecting Supabase to FlutterFlow
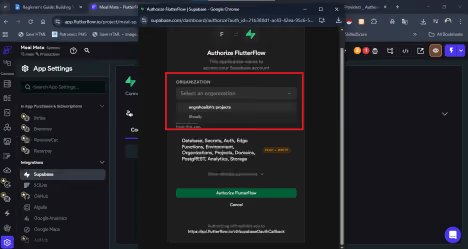
Figure 5: Project Selection in FlutterFlow
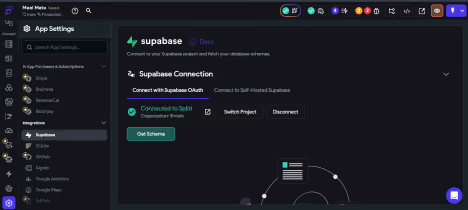
Figure 6: Finalizing Supabase Connection
Note: Before Moving to the next step make sure to set Authentication to Supabase. Step 2: Create a Users Table in Supabase
Supabase saves passwords safely behind the scenes, but you need a place to save extra user info (like their name). Create a table with these columns:
Step 3: Create the "Sign Up" Button
1. On your Sign Up page, add two TextFields (one for Email, one for Password) and a Button.
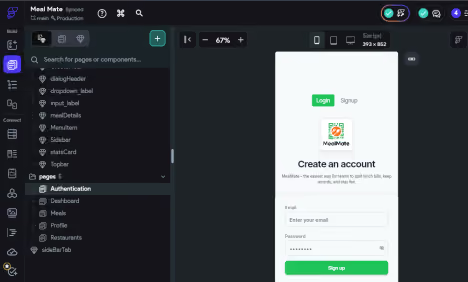
Figure 7: Sign Up Page UI Elements
2. Click the Button and open the Action Flow Editor (on the right side of the screen). 3. Add a new Action: Backend / Database > Authentication > Create Account.
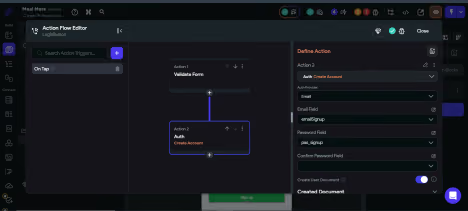
Figure 8: Action Flow Editor for Creating Account
4. Choose your Auth Provider (Email).
5. Select your Email and Password TextFields from the dropdowns, so FlutterFlow knows where to read the text.
Step 4: Create the "Log In" Button
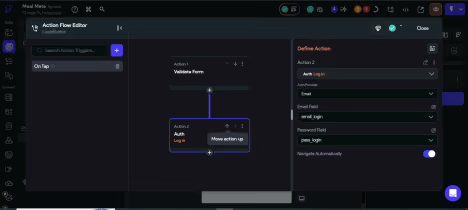
Figure 9: Login Action Configuration
1. On your Login page, add an Email TextField, a Password TextField, and a "Log In" Button. 2. Click the Button and open the Action Flow Editor.
3. Add a new Action: Backend / Database > Authentication > Log In. 4. Choose your provider, link the TextFields, and add a Navigate To action right after it to send them to the Home Page.
Step 5: Create the "Forgot Password" Button
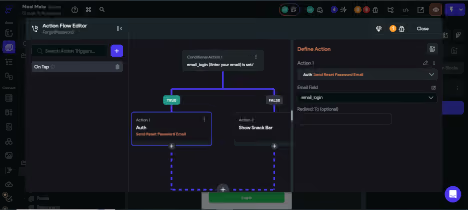
Figure 10: Reset Password Action Configuration
● If using Firebase: Add a button on your app that triggers the Authentication > Reset Password action. Firebase will automatically email a reset link to the user. ● If using Supabase, add a button that triggers the Supabase Authentication > Reset Password action. This sends a special link to the user's email that redirects them back to a "New Password" page you build inside your app.
.svg)
.svg)


.avif)
